
株式会社マネーフォワードでは一緒に働く仲間を募集しています
- AI実装プロダクトマネージャー
- バックエンドエンジニア
- カスタマーサクセスOps
- 他32件の職種
- 開発
- ビジネス
- その他
こんにちは。
マネーフォワードで開発推進活動をしています木村です。
今日は、google-authenticator-railsというgemを使ってみたので紹介したいと思います。
google-authenticator-rails とは、Googleが提供するAuthenticatorアプリ(iPhone, Android)を用いて二段階認証をするためのgemです。
Two-Factor Authentication とか Multi-Factor Authentication と呼ばれている認証です。
認証に使われているアルゴリズムは TOTP (Time-based One-time Password Algorithm) で、いくつかの条件(秘密鍵の共有等)と時刻を用いて認証コードを生成しています。
Google検索すると色々情報はみつかるので、興味のある方は検索してみてください。
では、さっそく簡単なアプリを作り、MFA認証するところまでを説明していきます。
Railsアプリを作りgemをインストールします。
$ mkdir google-authenticator-rails-example
$ cd google-authenticator-rails-example
$ bundle init
$ echo "gem 'rails'" >> Gemfile
$ bundle install --path vendor/bundle
$ bundle exec rails new . --skip-bundle
$ echo "gem 'google-authenticator-rails'" >> Gemfile
$ bundle
インストール時のバージョンは、Rails v4.2.3, google-authenticator-rails v1.2.1 です。
Userモデルを作成し、google-authenticator-railsに必要なカラムを用意します。
cf. GoogleAuthenticatorRails::ActiveRecord::ActsAsGoogleAuthenticated
$ bundle exec rails g model user name:string email:string salt:string google_secret:string
Authlogic gemを使用している際はpersistence_tokenというカラム名が被ってしまうため、READMEではsaltというカラム名を使っているようです。
$ bundle exec rake db:create
$ bundle exec rake db:migrate
Userモデルを作成したら、acts_as_google_authenticatedを適用します。
# app/models/user.rb
class User < ActiveRecord::Base
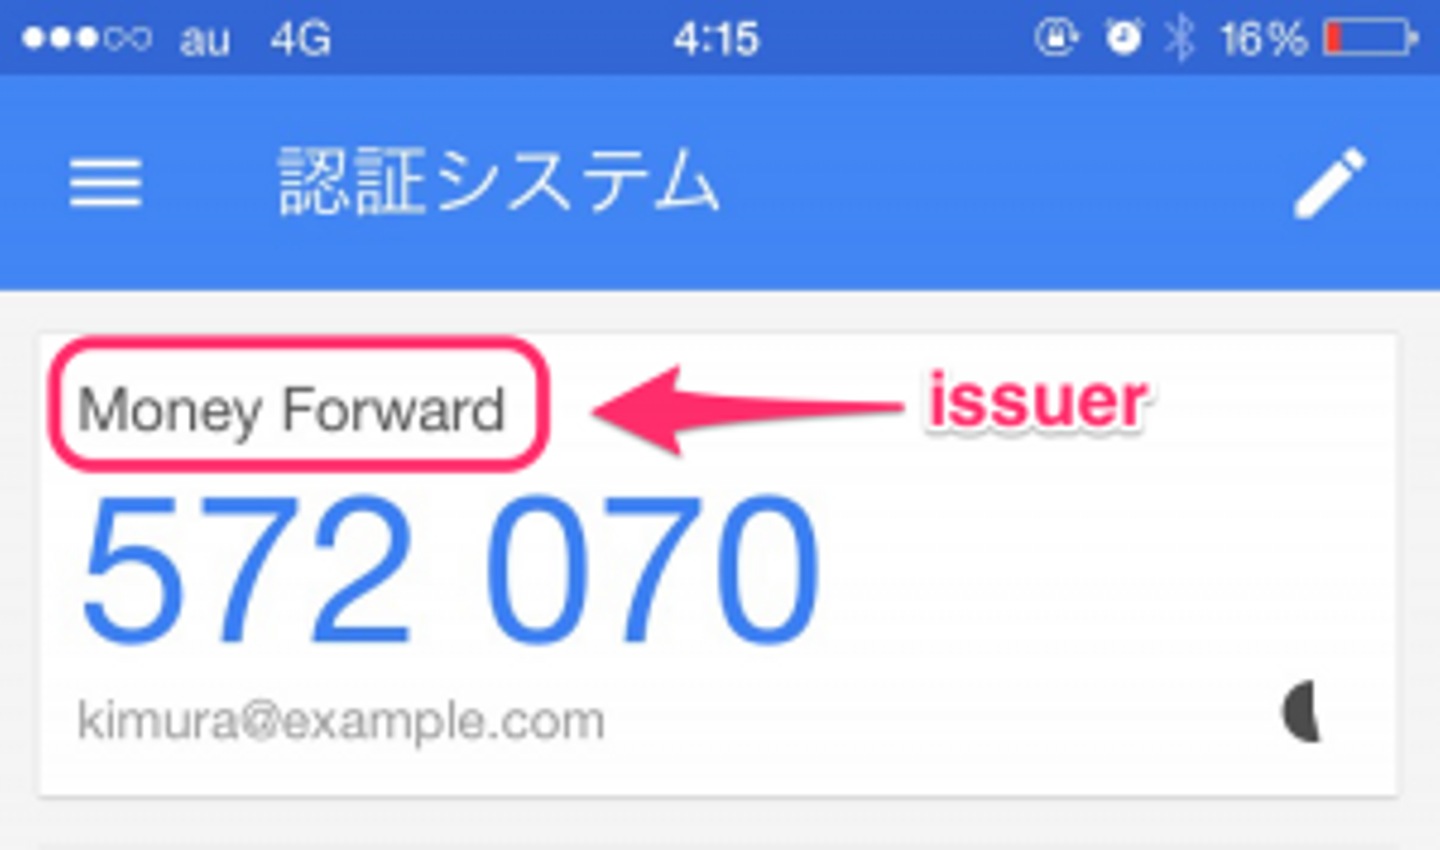
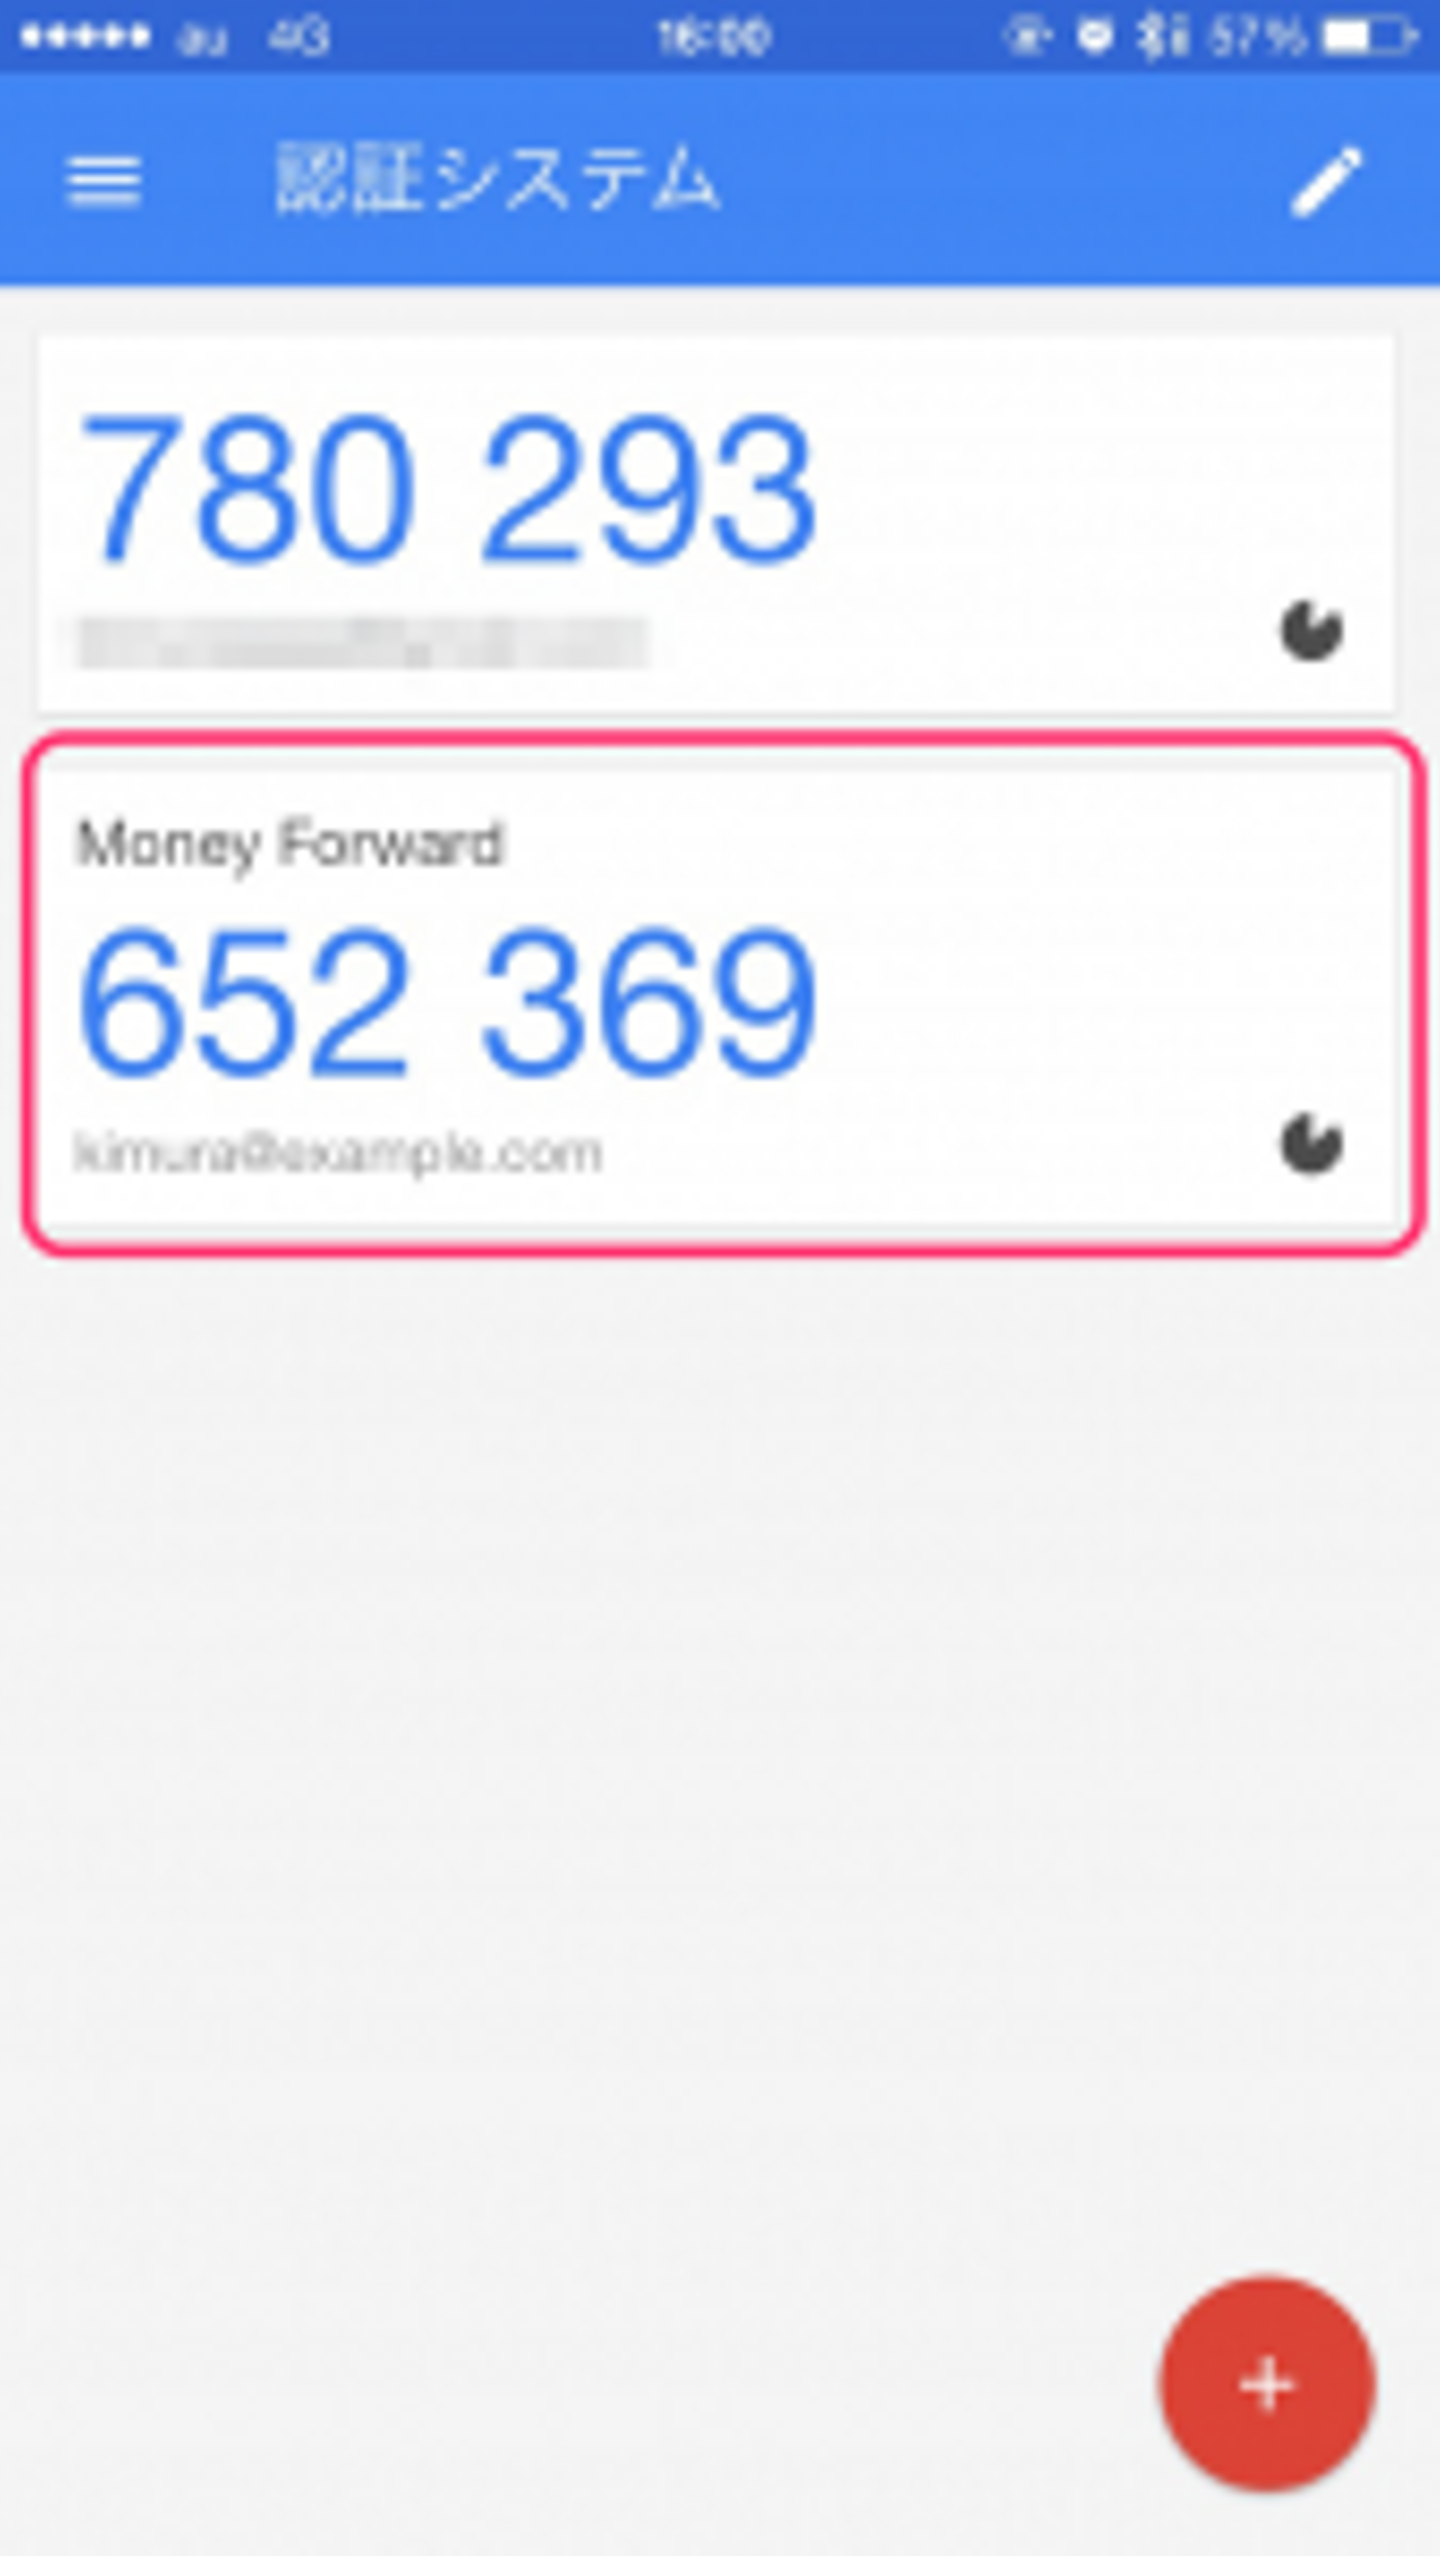
acts_as_google_authenticated lookup_token: :salt, drift: 30, issuer: 'Money Forward'
before_save {|record| record.salt = SecureRandom.hex unless record.salt }
after_create {|record| record.set_google_secret }
end
acts_as_google_authenticatedでモデルに認証時に必要な機能を追加します。
lookup_tokenは前述の別名にしたカラムの設定です。
driftは認証時に遅延を許容するため秒数です。30を指定すると、30秒前の認証コードは有効になります。
issuerは認証コードを取得する際の表示で使用されます。
UserMfaSessionを作成します。MFAのsessionを扱うクラスです。GoogleAuthenticatorRails::Session::Baseを継承したクラスを作るだけです。
# app/models/user_mfa_session.rb

class UserMfaSession < GoogleAuthenticatorRails::Session::Base
  # no real code needed here
end
$ bundle exec rails g controller user_mfa_sessions
UserMfaSessionを処理するControllerクラスです。
# app/controllers/user_mfa_sessions_controller.rb

class UserMfaSessiosnController < ApplicationController
  skip_before_filter :check_mfa

  def new
    @user = current_user
  end

  def create
    @user = current_user
    if @user.google_authentic?(params[:auth][:mfa_code])
      UserMfaSession.create(@user)
      redirect_to root_url
    else
      flash[:error] = "Wrong code"
      render :new
    end
  end
end
Userモデルにacts_as_google_authenticatedを適用した際にGoogleAuthenticatorRails::ActiveRecord::Helpersがincludeされるので、
User#google_authentic?で認証コードが正しいか判定できるようになります。
# app/views/user_mfa_sessions/new.html.erb
<% if flash[:error] %>
<%= flash[:error] %>
<br />
<% end %>
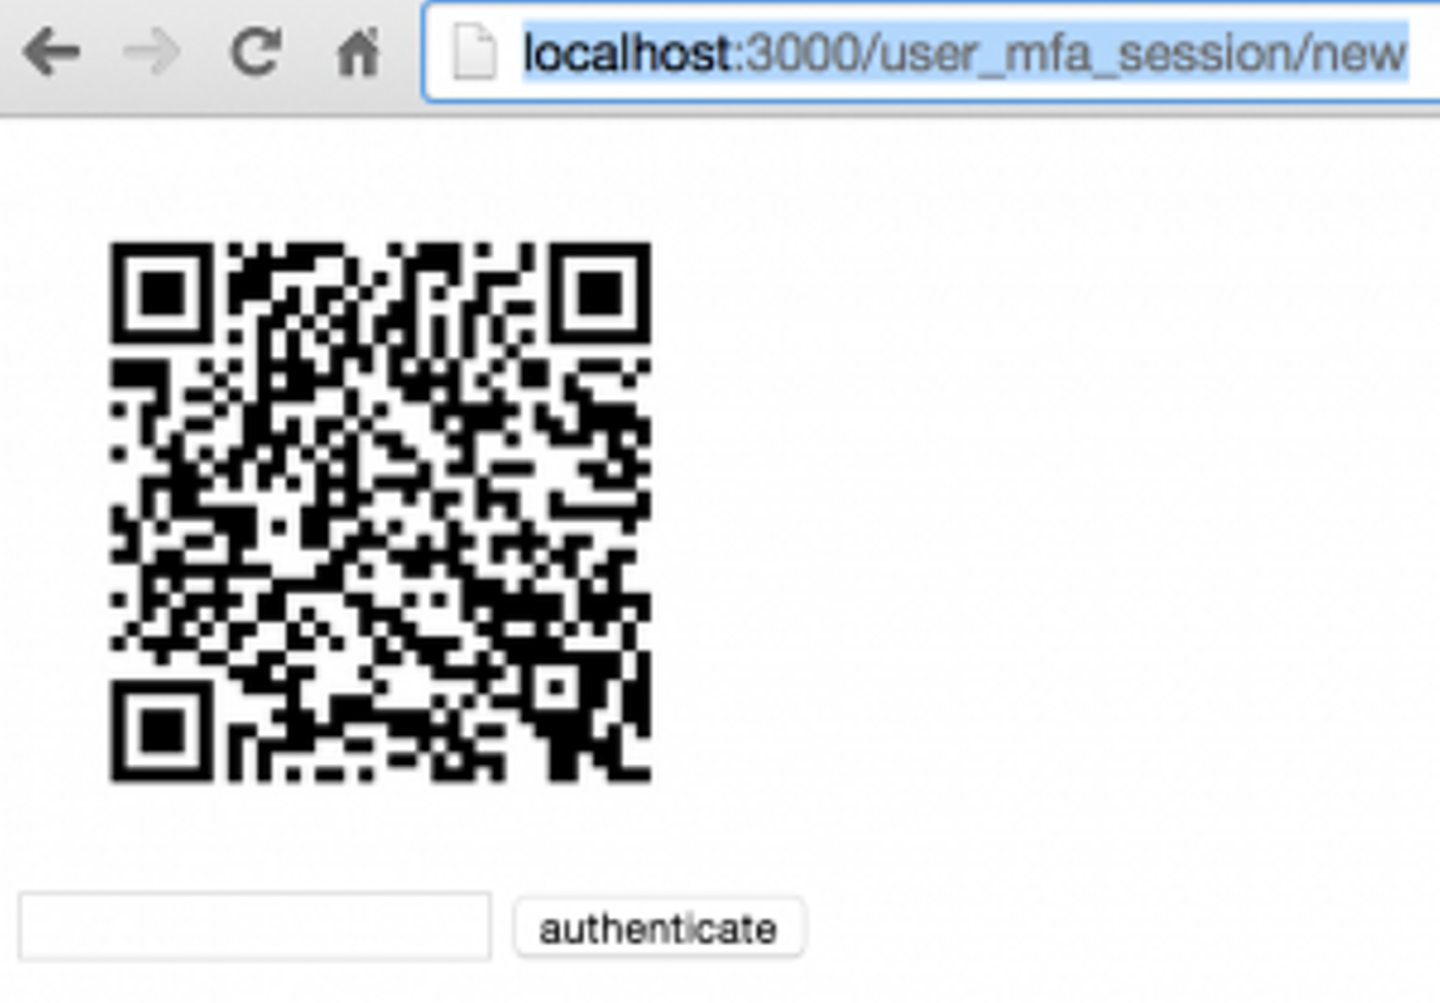
<img src="<%= @user.google_qr_uri %>">
<br />
<%= form_tag user_mfa_session_path, method: :post do %>
<div class="actions">
<%= text_field :auth, :mfa_code %>
<%= submit_tag 'authenticate' %>
</div>
<% end %>
User#google_qr_uriでQRコードのイメージのURLが取得できます。
Googleが提供しているQRコードを生成するAPIを使用しています。
QRコードにはGoogle authenticatorで認証コードを生成するための情報が入っています。
Userモデルに追加されたgoogle_secretの値をもとにTOTPを使用して生成したProvisioning URIです。
# https://github.com/jaredonline/google-authenticator/blob/v1.2.1/lib/google-authenticator-rails/active_record/helpers.rb#L14

ROTP::TOTP.new(google_secret_value, :issuer => google_issuer).provisioning_uri(google_label)
# => "otpauth://totp/kimura@example.com?issuer=Money+Forward&secret=rnibc63l3ylprhpe"
# app/controllers/application_controller.rb

class ApplicationController < ActionController::Base
  before_filter :check_mfa

  def current_user
    @current_user = User.find_or_create_by(name: 'kimura', email: 'kimura@example.com')
  end

  private
  def check_mfa
     if !(user_mfa_session = UserMfaSession.find) && (user_mfa_session ? user_mfa_session.record == current_user : !user_mfa_session)
      redirect_to new_user_mfa_session_url
    end
  end
end
今回は便宜上current_userを固定にしていますが、よくある認証系gem等が生やしてくれるcurrent_userをそのまま使うと良いと思います。
#check_mfaでMFA認証が済んでいるかどうかをチェックしており、認証済みでなければMFA認証するようリダイレクトしています。
# app/controllers/top_controller.rb

class TopController < ApplicationController
  def logout
    UserMfaSession.destroy
    redirect_to :root
  end
end
# config/routes.rb

Rails.application.routes.draw do
  root 'top#index'
  get 'logout' => 'top#logout'
  resource :user_mfa_session, only: %i(new create)
end
準備が整えばRailsアプリを起動して http://localhost:3000 にアクセスすると http://localhost:3000/user_mfa_session/new へリダイレクトされてQRコードと入力フォームが表示されます。
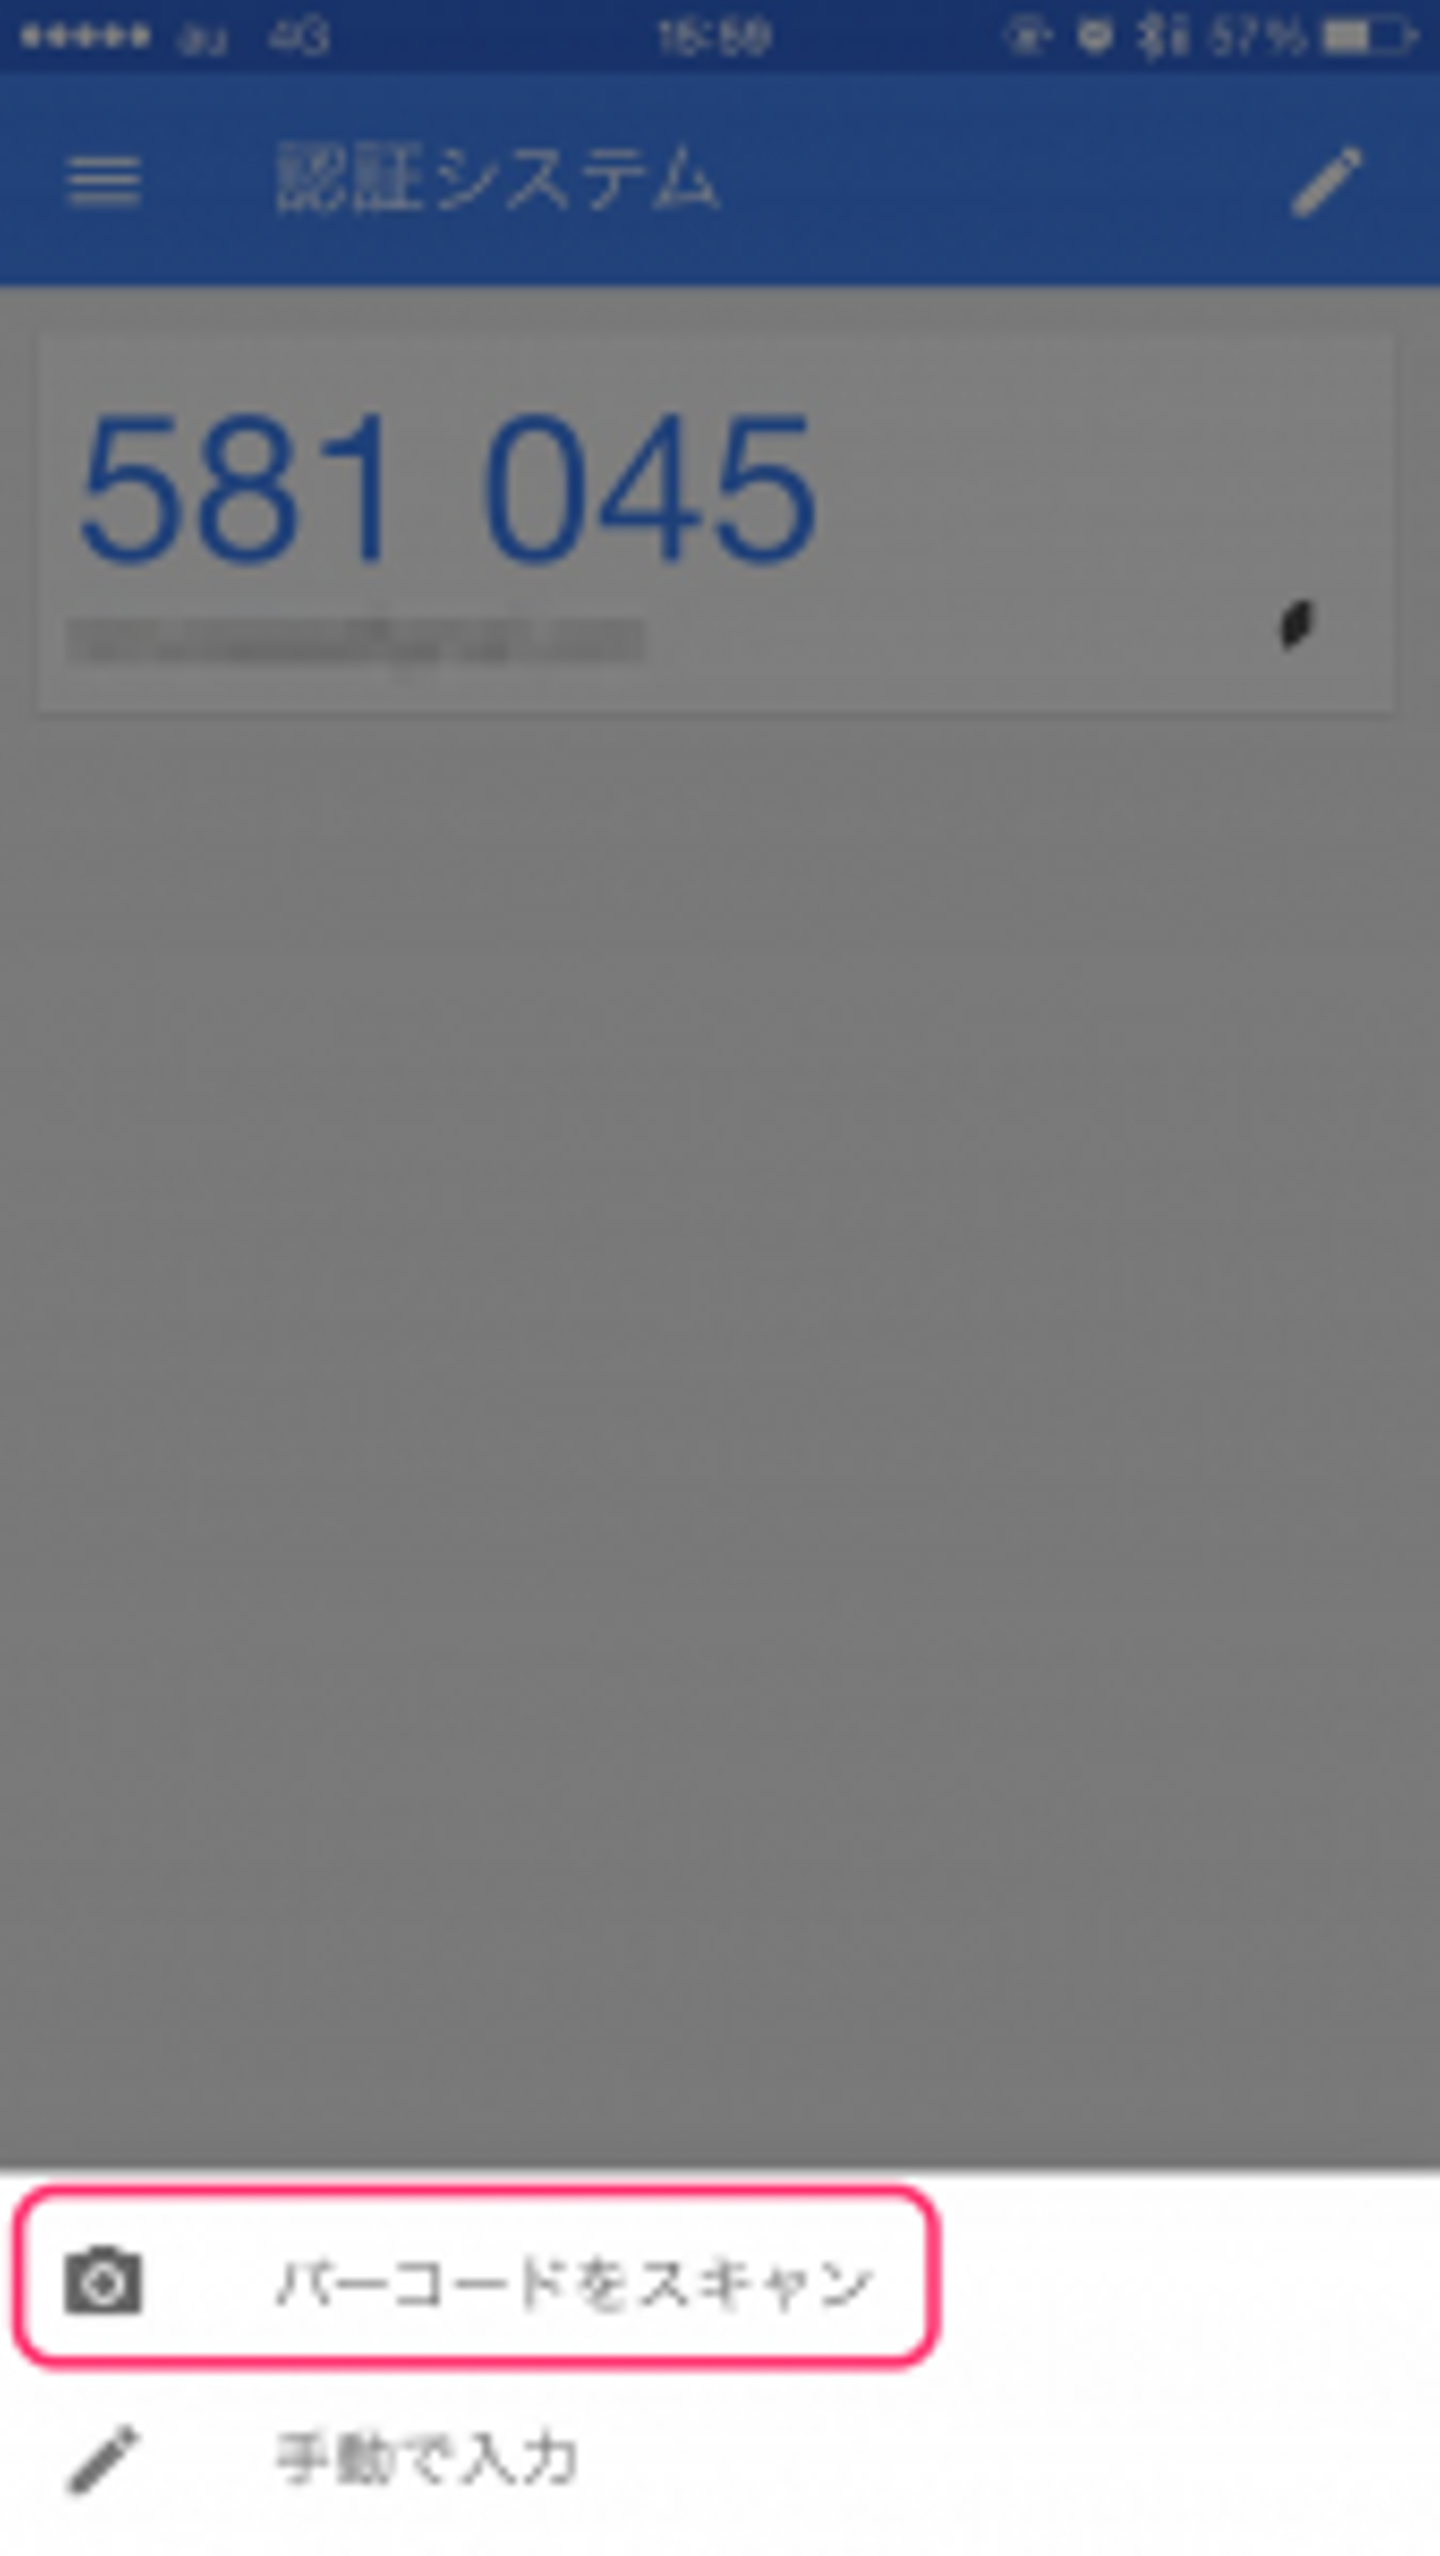
このQRコードをiPhoneのAuthenticatorアプリで読み込みます。
Authenticatorアプリを起動し、右下の「+」をタップします。
「バーコードをスキャン」をタップします。
QRコードリーダーが現れるのでQRコードを読み込みます。
正常に読み込みが完了すると認証コードが生成されるようになります。
この認証コードを先ほどのフォームに入力すると認証できることが確認できます。
いかがだったでしょうか?
必要なコード量も少なく、比較的簡単にMFA認証を試すことができました。
MFA認証済みかどうかの判定も既存の認証を邪魔しないので、既に運用中のアプリに追加することも簡単にできるので、興味のある方は試してみてはいかがでしょうか。
マネーフォワードでは、思い立ったらすぐ行動できる、フットワークの軽いエンジニアを募集しています。
ご応募お待ちしております。
【採用サイト】
■『マネーフォワード採用サイト』 https://recruit.moneyforward.com/
■『Wantedly』 https://www.wantedly.com/companies/moneyforward
【公開カレンダー】
■マネーフォワード公開カレンダー
【プロダクト一覧】
■家計簿アプリ・クラウド家計簿ソフト『マネーフォワード』 https://moneyforward.com/
■家計簿アプリ・クラウド家計簿ソフト『マネーフォワード』 iPhone,iPad
■家計簿アプリ・クラウド家計簿ソフト『マネーフォワード』 Android
■クラウド型会計ソフト『MFクラウド会計』 https://biz.moneyforward.com/
■クラウド型請求書管理ソフト『MFクラウド請求書』 https://invoice.moneyforward.com/
■クラウド型給与計算ソフト『MFクラウド給与』 https://payroll.moneyforward.com/
■消込ソフト・システム『MFクラウド消込』 https://biz.moneyforward.com/reconciliation/
■マイナンバー管理『MFクラウドマイナンバー』 https://biz.moneyforward.com/mynumber


![]()